Blog
Guide to creating a custom captain’s armband
Have you arrived at our site because you want to customize your captain’s armband online but don’t know where to start?
No problem, this guide will help you step by step in making your own custom captain’s armband, making the process smooth and the result splendid.
Step one: choose the size
First you will need to choose the size of your captain’s armband. This will not be difficult: you will only need to choose between sizes S | M | L, which vary in the diameter that the sash can reach. Size S is recommended for children and boys up to about 12 years of age, while the M sash is good for men and boys aged 13 and up, and as for size L, it is suitable for those with powerful arms. Since the fabric from which it is made is stretchy, the band molds to different sizes and dimensions.
Step two: metal packaging yes or no?
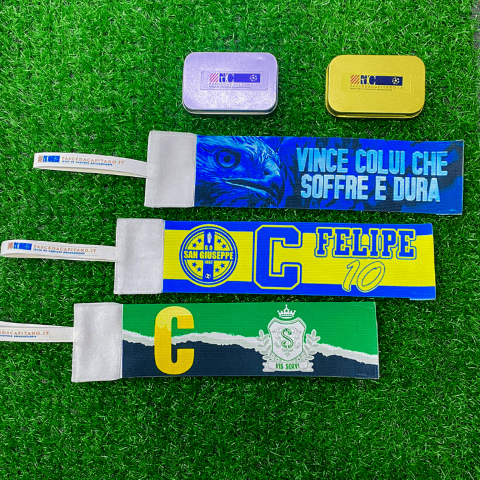
Whichever type of headband you choose, you will have the opportunity to purchase a metal box to contain it, so as to make the headband even more valuable. A small 8-centimeter box that perfectly holds the headband and will allow you to carry it match after match without ruining it.
Fourth step: it’s time for customization
Customization can be done by following two methods: the first involves do-it-yourself custom ization through a configurator; the second consists of customization throughgraphic assistance, where one of our graphic designers will contact you to tune the look of your band. You will only have to choose images, lettering or numbers, and our experts will create the best graphics for you to highlight each element. The final product will be created only after your confirmation.
If you choose DIY customization, a window will open showing a white captain’s armband with a treated border. This border is used to outline the parts that could be cut or damaged during printing, so we recommend that you do not place important images or lettering beyond the hatching so that they are not cut off.
We suggest you start with the background: you can leave it white or use one of the solid-colored backgrounds already available in the portal. Next, choose thedominant element of your graphic and place it where you prefer, avoiding the area beyond the hatching. Once completed, you can add lettering, numbers, symbols and emoji directly from our portal.
Once you have completed all the steps and clicked the green button (DONE!), the band will automatically be added to your cart and you will just have to complete the payment by choosing the method you prefer.
Trust us, practice is much easier than theory; now all you have to do is try everything we have explained in this article by making a custom captain’s armband, starting right here.
Need help?
Write to us for information about our products and their customization.

